¿Cómo convierte una pantalla LED el vídeo en luz?

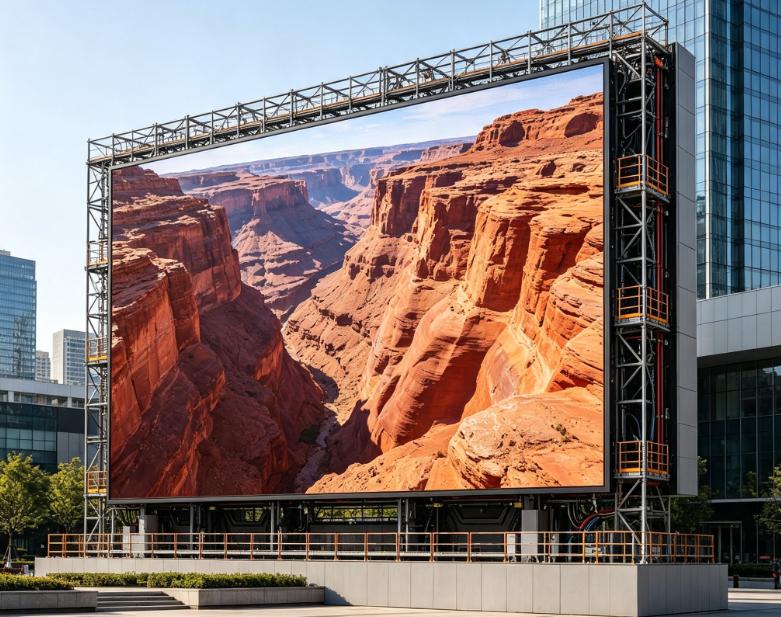
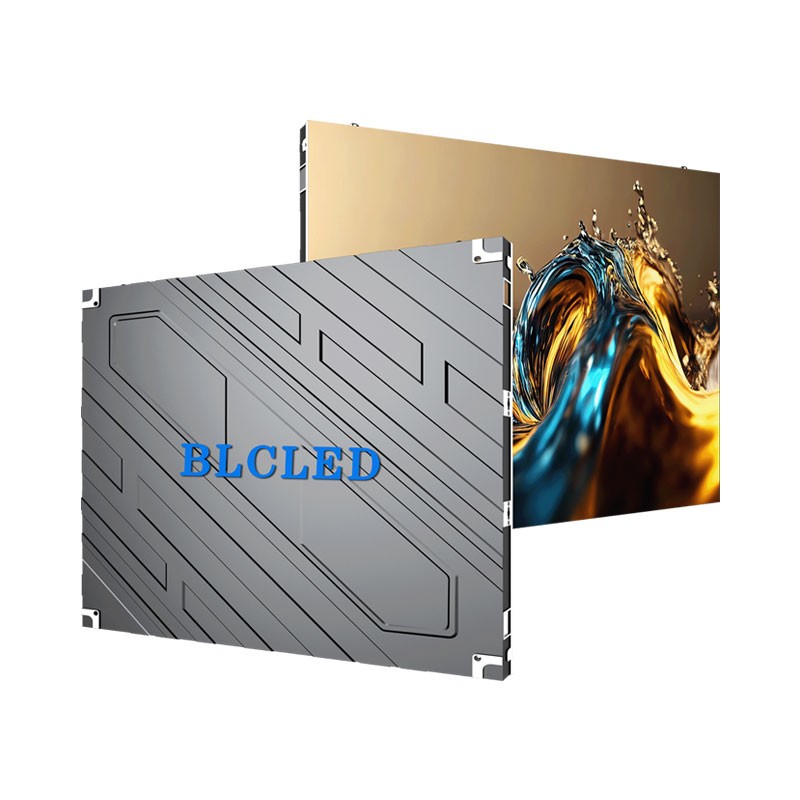
Un comprador puede ver una imagen brillante en una pantalla LED sin comprender la cadena de decisiones que hay detrás. Conocer ese proceso facilita la especificación del contenido, la distancia de visualización y el acceso a los servicios, sin tratar la pantalla como una caja negra misteriosa. La imagen comienza como datos de píxeles mapeados Una pantalla LED comienza con una fuente de video, pero no puede mostrarla hasta que un procesador mapea la imagen a la disposición física de píxeles. Una computadora portátil, reproductor multimedia, cámara o controlador envía contenido al procesador. El procesador de video y el sistema de control escalan y mapean la imagen entrante al lienzo de la pantalla. Las tarjetas receptoras distribuyen los datos de visualización mapeados a los módulos correspondientes. Por eso, una pantalla LED debe diseñarse teniendo en cuenta su contenido real y el tamaño de pantalla previsto. Un amplio muro de bienvenida, un telón de fondo para un escenario y una estrecha franja informativa pueden utilizar LED, pero sus prioridades de visualización y contenido difieren desde el principio. Cada píxel mezcla tres colores controlables. Cada píxel a todo color utiliza fuentes de luz roja, verde y azul. El controlador ajusta su salida relativa para crear el color y el brillo necesarios en cada punto de la imagen. Un campo blanco requiere una contribución coordinada de los tres canales de color; una escena azul intenso requiere una combinación muy diferente. Millones de combinaciones controladas hacen posible la creación de vídeo, texto y gráficos. El paso de píxel es la distancia entre los centros de píxeles vecinos, por lo que influye en la distancia mínima a la que el espectador puede situarse antes de percibir la estructura de la imagen. Un paso de píxel menor permite apreciar detalles más finos a corta distancia, pero solo resulta útil cuando el mensaje requiere realmente ese nivel de detalle. La pregunta clave es qué información deben leer las personas, no simplemente cuál es el número más pequeño. El gabinete transporta la alimentación de la señal y la alineación. Un módulo de visualización es solo una capa de la pared terminada. Los gabinetes proporcionan la estructura mecánica y la alineación, a la vez que alojan las fuentes de alimentación, el hardware de recepción, los módulos y las conexiones de señal que permiten que los módulos independientes funcionen como una sola pantalla. Si una línea de gabinetes está desalineada o una ruta de señal está configurada incorrectamente, un módulo técnicamente capaz no puede ofrecer un resultado nítido y continuo. Por este motivo, los paneles de videowall LED se planifican como un sistema integrado, en lugar de seleccionarse como módulos individuales. El equipo de instalación debe confirmar la distribución del gabinete, la capacidad del controlador, el trazado del cableado, la protección eléctrica y una ruta viable para el servicio futuro antes de que las pruebas de contenido sean útiles. Escenario Lo que sucede Por qué debería importarle al equipo del proyecto. Entrada de contenido Una fuente envía contenido de vídeo o gráfico al procesador. La resolución de la fuente y la relación de aspecto afectan al escalado y a la claridad del texto. Tratamiento El procesador asigna cada fotograma al lienzo de píxeles real de la pantalla. Un mapeo correcto evita imágenes recortadas, logotipos estirados y texto mal ubicado. Recepción Las tarjetas receptoras distribuyen los datos mapeados a los módulos dentro de cada armario. Una ruta de señal planificada ayuda a los técnicos a aislar una falla sin afectar el resto de la pared. Salida de luz Los LED rojos, verdes y azules producen los colores visibles de los píxeles. El brillo y el tamaño de los píxeles deben ser adecuados para la habitación y para el observador más cercano. La función Refresh mantiene la coherencia del movimiento. La frecuencia de actualización describe con qué frecuencia el sistema de control LED actualiza la salida de luz, mientras que la velocidad de fotogramas describe con qué frecuencia se suministran nuevos fotogramas de vídeo. La frecuencia de actualización cobra especial importancia con contenido de movimiento rápido y cuando la pantalla LED es capturada por una cámara. Es un factor clave para la calidad de la imagen, junto con la velocidad de fotogramas, la preparación del contenido, el procesamiento de la señal, la calibración, la luz ambiental y el estado físico de la pantalla. Por lo tanto, una pantalla LED a todo color debe evaluarse con el contenido que realmente reproducirá. El contenido de orientación lenta puede revelar problemas de diseño y de contraste; las imágenes de productos rápidas pueden revelar una mala escala o una señal débil. Probar ambos tipos antes de la entrega es más útil que basarse únicamente en una demostración en bucle. Un solo módulo debe mantenerse sincronizado. Un panel de visualización LED debe recibir la información de temporización y color correcta junto con sus paneles vecinos; de lo contrario, la imagen podría mostrar secciones faltantes, inconsistencias de temporización o una diferencia de color visible. En cambio, las uniones físicas se controlan principalmente mediante la alineación y la planitud del gabinete. Por lo tanto, la puesta en marcha debe incluir una prueba de la pantalla completa, no solo una verificación de los módulos individuales. Esta es la forma más sencilla de confirmar que la pantalla completa se comporta como una sola superficie. El entorno de visualización completa la imagen. La misma pantalla puede verse nítida en un vestíbulo con sombra y distorsionada junto a un ventanal brillante, ya que la luz ambiental altera el contraste percibido. Los ángulos de visión, los reflejos en las superficies y la ruta habitual de circulación también influyen en lo que ve el público. Estas condiciones deberían guiar la jerarquía del contenido tanto como la selección del hardware. Pruebe el texto más pequeño e importante desde la posición de visualización más cercana y realista. Compruebe una imagen fija,clip de movimiento y fuente en vivo antes de aceptar el mapeo. Mantenga documentado el acceso a la energía, la señal y los servicios para el equipo operativo. Cuando un proyecto requiere una gran superficie continua, una pantalla LED comercial puede integrar todas las decisiones en un solo elemento. Las opciones de instalación fija para interiores de BLC LED incluyen estructuras de gabinete de alta precisión y configuraciones de servicio frontal, que combinan una alineación precisa con un acceso práctico para el mantenimiento en un espacio construido. Una forma práctica de interpretar la tecnología. Una pantalla LED funciona transformando información digital mapeada en luz controlada en millones de píxeles. El siguiente paso útil consiste en conectar este sencillo principio con el lugar: definir el contenido real, identificar al espectador más cercano, confirmar la superficie física y planificar el mantenimiento de la pantalla. Esta secuencia permite que la tecnología esté al servicio del mensaje, en lugar de convertir el proyecto en un mero ejercicio de especificaciones. Preguntas frecuentes ¿Cada píxel LED contiene luz roja, verde y azul? Una pantalla a todo color utiliza fuentes de luz roja, verde y azul para formar los colores visibles de sus píxeles. El diseño exacto del empaque varía según el producto y la aplicación. ¿Qué cambia con el paso de píxel? El paso de píxel es el espacio entre los píxeles. Afecta a la cantidad de detalles que se pueden percibir a una distancia de visualización determinada y debe coincidir con la posición más cercana y significativa para el espectador. ¿Por qué se necesita un procesador de vídeo? El procesador adapta el contenido entrante al lienzo físico de píxeles de la pantalla, mientras que el sistema de control distribuye los datos mapeados a las secciones de visualización correspondientes. ¿Puede la misma pantalla LED mostrar vídeo y gráficos en directo? Sí, siempre que la fuente, el procesador, la asignación y el rendimiento de actualización estén configurados para el material previsto. Ambos deben probarse durante la puesta en marcha. ¿Qué debe comprobar el equipo de obra antes de la entrega? Verifique el contenido real, el mapeo, el brillo de la luz instalada, la continuidad de la señal y la ruta segura para el mantenimiento rutinario del módulo o de la alimentación eléctrica.
17th septiembre 2026

¿Cómo se adaptan las pantallas LED flexibles a los espacios curvos?

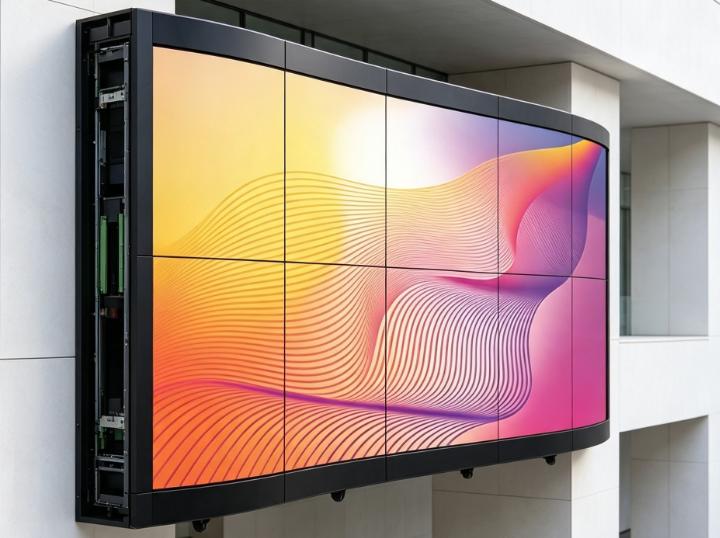
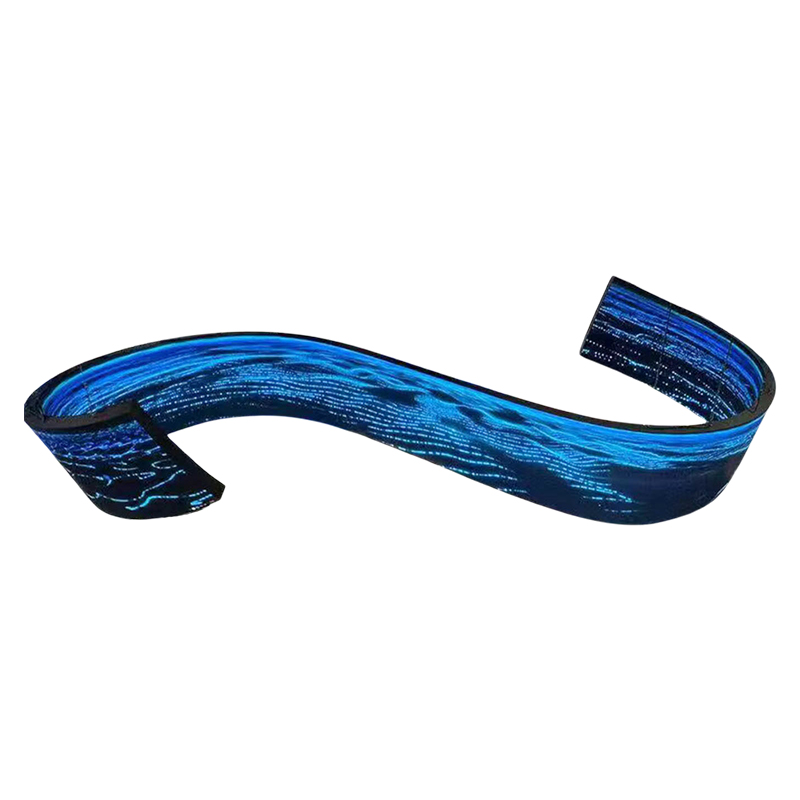
Dibujar una pantalla LED plana es sencillo, pero muchos interiores comerciales, atrios, museos y fachadas corporativas no lo son. La pregunta clave no es si un panel flexible se puede doblar, sino si la curvatura, el acceso para el mantenimiento, la calidad de la imagen y la estructura de soporte se mantendrán inalterables tras la instalación. Este artículo explica cómo evaluar esta idoneidad antes de que un diseño curvo se convierta en una solución costosa e inviable. La forma del sitio determina el enfoque de exhibición. La geometría del emplazamiento debe ser el factor determinante en la decisión, ya que una pantalla que se vea bien en alzado puede fallar en los bordes, juntas o puntos de servicio. Una pantalla LED flexible resulta útil cuando la superficie de instalación presenta una curva definida o un contorno irregular. Registre la superficie real, las dimensiones útiles, las posiciones de visualización, los obstáculos y el acceso del técnico. Estas mediciones determinarán si los paneles flexibles, los gabinetes curvos o las secciones rígidas más pequeñas se pueden instalar de forma fiable. Estado del sitio Enfoque flexible Señalar para confirmar Arco único y suave Módulos curvos o paneles flexibles Radio mínimo y espaciamiento entre soportes Cilindro o columna hermética Módulos flexibles o de conexión blanda Continuidad de la costura y espacio libre para cables Curvas y esquinas mixtas Secciones con forma personalizada Geometría de transición y acceso al servicio Pared plana con una curva característica Diseño híbrido rígido y flexible Alineación conjunta entre sistemas El radio es un límite mecánico, no una sugerencia de diseño. Cada pantalla LED flexible tiene un rango de flexión específico que debe considerarse un límite mecánico. Superarlo puede generar tensiones, uniones irregulares o daños en los componentes. Verifique el radio de flexión con respecto al conjunto completo, incluyendo la superficie, los sujetadores, los cables y la protección. El término «curvo» puede describir resultados muy diferentes. Un arco amplio puede requerir gabinetes curvos, mientras que una columna estrecha puede necesitar una conexión flexible y un método de soporte distinto. La geometría medida —y no simplemente el hecho de que un diseño se describa como «curvo»— debe determinar qué estructura de pantalla LED es la más adecuada. Los módulos flexibles resuelven problemas visuales específicos. Una pantalla LED flexible resulta útil cuando la superficie de visualización debe adaptarse a los contornos arquitectónicos cambiantes. Las conexiones flexibles permiten que los módulos se adapten mejor a superficies curvas o irregulares que los ensamblajes totalmente rígidos, lo que ayuda a mantener una alineación más uniforme entre las secciones. El beneficio es mayor cuando la pantalla forma parte del espacio, como una pared curva de recepción, una columna revestida o un elemento escultórico. El diseño aún requiere un soporte estable y una ruta de reemplazo clara. Las conexiones flexibles aún requieren una instalación cuidadosa. Las conexiones con cableado flexible aún requieren un enrutamiento organizado de los cables, un alivio de tensión adecuado y una identificación clara. Una mala gestión del cableado puede ejercer una tensión innecesaria sobre los conectores, complicar el mantenimiento y aumentar el riesgo de conexiones de señal o alimentación inestables. Revise estos controles antes de la aprobación: Indique en el dibujo la dirección de plegado y el radio mínimo. Deje suficiente holgura en el cable para que el movimiento no ejerza tensión sobre los conectores. Defina la estructura de soporte de manera que los módulos LED no se utilicen como elementos portantes. Mantenga una vía de acceso despejada para el reemplazo de módulos detrás de los embellecedores o accesorios circundantes. Pruebe con el radio más estrecho y la costura más visible. Estos controles hacen que la flexibilidad sea repetible en lugar de requerir ajustes de última hora en el sitio. La calidad de la imagen depende de algo más que la curva. La calidad final de la imagen depende del tamaño del píxel, la distancia de visualización, la calibración, el procesamiento, el contenido y la geometría. Quienes observen la imagen de cerca pueden notar líneas de unión que desaparecen a mayor distancia, mientras que las cámaras pueden revelar artefactos relacionados con la frecuencia de actualización o el escaneo que no son evidentes a simple vista. Una pantalla curva aún necesita una referencia de calibración consistente. La calibración comienza con una referencia repetible. Antes de evaluar la instalación curva, verifique el orden de los módulos, la asignación de píxeles, la configuración de la tarjeta receptora y la consistencia del brillo. Una sección rotada o con una asignación incorrecta puede ser más difícil de diagnosticar en ángulos variables. Utilice el mismo contenido de prueba tanto en el taller como en la entrega. Los patrones de prueba en gris neutro pueden revelar discrepancias de brillo, los degradados oscuros pueden evidenciar problemas de uniformidad sutiles y el texto pequeño puede ayudar a identificar errores de mapeo o alineación. Realice las pruebas desde las posiciones de visualización principales, incluyendo los laterales. Cuando una forma personalizada es mejor que una curva continua Una pantalla LED con forma especial se adapta mejor a círculos, esferas, transiciones en ángulo recto o contornos cambiantes que no se pueden seguir con una sola curva. El proceso comienza con planos precisos y una clara división entre la superficie de la pantalla, el marco y la estructura del edificio. BLC LED ofrece sistemas de visualización flexibles y con formas creativas para aplicaciones como arcos, círculos, columnas, esferas y estructuras cúbicas. Un diseño híbrido puede reducir el riesgo. Un diseño híbrido puede reducir la complejidad cuando solo una parte de la pared requiere una pantalla curva. Los gabinetes rígidos pueden cubrir las secciones planas, mientras que los módulos flexibles o con forma personalizada se utilizan solo donde la geometría lo requiere.ellos. Pruebe el límite entre los sistemas. Confirme el paso de píxeles, la profundidad del gabinete, la calibración, el ángulo de visión y el acceso para el servicio, de modo que la transición siga siendo visual y mecánicamente coherente. Un proceso práctico de aprobación para proyectos de LED curvos La aprobación debe responder a cuatro preguntas: ¿Cuál es la geometría exacta? ¿Qué construcción se mantiene dentro de sus límites mecánicos? ¿Cómo se probará la imagen? ¿Cómo reemplazará un técnico un módulo defectuoso? Mantenga un paquete de aprobación conciso que contenga el plano de medición, el mapa de radios, el concepto de soporte, las rutas de los cables, las distancias de seguridad para las instalaciones y los resultados de las pruebas. La pantalla flexible adecuada se adapta al sitio y al flujo de trabajo. La pantalla flexible adecuada debe seguir la geometría medida sin generar un mantenimiento complicado. Los módulos flexibles se adaptan bien a curvas predecibles, las secciones con formas personalizadas funcionan mejor para contornos cambiantes y los diseños híbridos pueden reducir la cantidad de construcción especializada necesaria. Analice conjuntamente la geometría, el soporte, el acceso para el servicio y las pruebas de imagen; de esta manera, con una descripción clara, podrá considerar la amplia gama de soluciones de pantallas LED disponibles. Preguntas frecuentes ¿Para qué se utiliza una pantalla LED flexible? Las pantallas LED flexibles se utilizan cuando la visualización debe adaptarse a una superficie curva, cilíndrica o irregular. Son especialmente útiles para elementos arquitectónicos, interiores comerciales, exposiciones y espacios de marca, donde un rectángulo plano dejaría huecos o alteraría la forma deseada. ¿Cómo sé si la curva es demasiado pronunciada? Mida el radio mínimo de la instalación completa y compárelo con el rango de flexión aprobado para el panel o armario seleccionado. En esta verificación, tenga en cuenta el soporte, los conectores, el recorrido del cable y el método de fijación. Nunca considere una maqueta visual como prueba de compatibilidad mecánica. ¿Son las pantallas LED flexibles aptas para uso en exteriores? La idoneidad depende del grado de protección, los materiales, el brillo, el diseño térmico y el método de instalación del producto específico. No se debe asumir que una pantalla LED flexible para interiores cumple con las condiciones exteriores. Confirme las especificaciones ambientales y los detalles de soporte para el lugar previsto. ¿Qué se debe probar antes de la entrega? Pruebe la cadena de señal completa con gradientes, texto fino, contenido oscuro, movimiento y gris neutro. Compruebe las uniones desde las zonas de visualización principales, verifique el mapeo y la calibración, y realice una sustitución de módulo de prueba mientras la ruta de acceso final aún esté disponible.
17th septiembre 2026

¿Cómo se puede mantener nítida una pantalla LED de vídeo para interiores?

A lobby screen has only a few seconds to do its job. Visitors should be able to read a welcome message, find an event, or recognise a brand without stepping back, squinting, or waiting for an animation to finish. That practical test is a better starting point for an indoor display than a long feature list. Clarity begins with the visitor’s stopping distance Viewing distance is the first control on whether an image looks intentional or merely bright. In a reception area, people may pause close to the screen, walk past it at an angle, or look up while checking in. An indoor LED display screen must therefore make its smallest important text readable from the nearest realistic position, not just look impressive from across the room. Pixel pitch matters because it sets how much image detail can be formed within a given area. A smaller pitch can support finer detail at close range, but it does not rescue an overcrowded message or a poorly placed screen. Treat pitch as part of a reading-distance decision: map the closest standing point, the usual walking route, and the farthest point where the message still has to work. The nearest viewer sets the hard limit The nearest viewer often reveals problems that a wide room view hides. Small text can merge into a gray band, and diagonal graphics can look rough when the image is asked to carry more detail than the screen and distance can comfortably deliver. For that reason, a scale test should use the smallest real-world item that matters. Put the actual reception message, QR code, menu, or wayfinding arrow on a trial canvas. If it is not comfortably readable at the closest intended position, simplify the content or revisit the display plan before moving on to cabinet details. Message hierarchy keeps the wall useful Good lobby content gives the eye one clear task at a time. A screen can carry several messages through the day, yet each frame should make its main message obvious before a visitor has time to look away. This is where an indoor LED video wall earns its space: it can create a continuous canvas, but only if the content respects the way people actually pass through the room. Build each scene around a simple hierarchy: One primary message, such as a welcome, direction, or event name. One supporting detail, such as a time, floor, or short callout. Clear contrast between text and its background. Enough empty space that the message does not compete with decorative motion. Movement should support the message instead of delaying it. Slow, purposeful transitions can make a wall feel alive, while rapid looping effects make text harder to catch for people who enter mid-sequence. A clear first frame is especially valuable in a lobby, where most viewers will not wait for a second chance to read it. Light around the screen changes the result Ambient light affects whether contrast remains comfortable and legible. A wall facing glass, reflective stone, or a bright entry zone may need a different brightness setting from the same wall placed deeper inside the building. The useful target is readable contrast without turning the display into the brightest object in a space meant for conversation or arrival. The installation plan should also allow content calibration. Test a representative colour palette and a plain background during commissioning, then record the agreed settings for future updates. Lobby situation What visitors need to see A practical content response Close check-in point Names and directions Large type, short lines, stable first frame Long approach corridor One recognisable message Strong shape, limited copy, high contrast Waiting area Longer story or programme Slower sequence with clear scene changes A service route protects the visual standard Maintenance access affects clarity long after installation day. A screen that is difficult to reach can leave a failed module, a colour mismatch, or a damaged surface in view for longer than anyone planned. Front or rear access should follow the available building space and a safe component-removal path, not an assumption made after the wall is framed. This is also where a project team can connect visual goals to the actual product structure. BLC LED’s Indoor BT Series uses a rigid 640 x 480 format with high-precision construction, system-backup support, and a hard-wired HUB connection. For a fixed indoor LED screen wall, those features are relevant when the brief calls for orderly alignment and a dependable display path, rather than simply adding specifications to a proposal. The handover should identify the approved brightness profile, common content layouts, the safe service direction, and the steps for checking a replacement module against the surrounding image. Those details help a facilities team restore the intended look under pressure. The screen and the message need one final rehearsal A finished installation should be tested as visitors will use it, not only as technicians see it. Walk the entrance route, stand at the check-in point, and test the welcome line, directional information, and short branded sequence. This rehearsal also exposes whether an indoor LED display is carrying too much. If visitors need to stop and decode the wall, reduce the copy, enlarge the primary message, or break the information into scenes. An indoor advertising LED display screen works best when it gives people a useful cue quickly, then lets the architecture and service experience do the rest. Summary An indoor wall stays clear when the plan begins with the closest viewer, gives every frame a clear message hierarchy, and preserves the image through a realistic service route. For lobby projects, the next decision is not which specification sounds largest; it is whether the proposed screen and content work together at the exact places visitors will stand and move. FAQ Does a smaller pixel pitch always make lobby content better? A smaller pitch can improve close-range detail, but content hierarchy still matters. Large, well-spaced text and clear contrast are often more valuable than adding detail that the message does not need. What content should an indoor LED video wall show first? Show the message a visitor needs immediately, such as a welcome, direction, or event name. Place secondary details after the main message is already clear. Can an indoor LED screen wall handle both branding and wayfinding? Yes, provided the two purposes do not compete in the same moment. Use short wayfinding scenes when visitors need direction, then return to brand content when the screen has more time to tell a story.
3rd septiembre 2026

¿Cómo puede una pantalla LED de alquiler adaptarse a diferentes escenarios?

A rental screen earns its place when it moves between stage designs without forcing the crew to relearn the system. A keynote may need a wide wall, while the next show calls for wings, a corner, or a curve. The practical question is whether those shapes can be built predictably with one disciplined workflow. Flexible Inventory Depends on Repeatable Geometry An LED rental screen becomes versatile when cabinet sizes, locks, service access, and signal paths work as one platform. Unrelated cabinets multiply spare-part decisions and assembly habits. A useful system limits those changes while preserving layout flexibility. Panel Sizes Should Solve the Layout Math Stage drawings rarely share one set of proportions. A 500 x 500 mm cabinet gives finer edge control, while a 1000 x 500 mm cabinet reduces handling across a large rectangle. The useful mix reaches common dimensions without creating rarely used panels. This is where a defined rental family becomes relevant. BLC LED’s BP series includes 500 x 500 mm and 1000 x 500 mm indoor panel options. Its high-precision die-cast enclosure supports quick, accurate assembly, so the cabinet platform follows the layout plan. Curves Need a Known Angle and Radius A curve is dependable only when the drawing and cabinet mechanism describe the same geometry. The BP platform supports 45-degree inner and outer curves, and eight cabinets can form a 1.25-meter-diameter circle in the specified configuration. That makes a curved LED screen a planned shape rather than an improvised bend. The radius must still be confirmed for the exact model, connectors, and supporting structure. Cabinets with the same outside dimensions do not necessarily share curve hardware or load paths. Indoor and Outdoor Shows Need Separate Configurations LED screens for events may share a modular appearance, but a ballroom and an open-air festival create different conditions. The inventory plan can preserve one workflow while keeping environmental specifications separate. Indoor and outdoor cabinets should not be treated as interchangeable. Brightness Follows the Venue, Not the Largest Number Indoor BP models provide 600 or 800 nits depending on pitch, while outdoor BP models provide 3,500 to 5,000 nits. Indoor output must work with controlled lighting and cameras; an outdoor stage may need more headroom against daylight. Protection ratings also separate the groups: indoor BP models are IP31, while outdoor BP models are IP65. Naming and packing logic can remain familiar without assigning one configuration to every venue. Viewing Distance Sets the Useful Pixel Pitch Pixel pitch should follow the nearest important viewing position and the level of detail in the content. The BP indoor range covers P1.56 through P3.91, while the outdoor range covers P1.95 through P4.81. A smaller pitch supports closer viewing, but screen size, processing, and budget still matter. A stage rental LED screen therefore needs a layout record with physical dimensions and the expected audience zone. A drawing without its viewing assumptions may fail at the next venue. Fast Changeovers Come From Standard Work Changeover speed depends on decisions made before loading. Cabinet labels, cable maps, controller files, spare locations, and packing order should match the drawing. Stable details let the crew focus on what is genuinely different. A practical show file should contain: A cabinet map with row, column, and curve positions. Power and data routes that match labeled cables. A controller preset named for the event and screen. A spare plan for compatible modules, cabinets, and tools. A quarantine rule for damaged parts. One Repair Should Be Rehearsed Before Show Day Service access matters because a fast build is incomplete if a failed section cannot be reached. BP rental cabinets support front and rear maintenance. The plan should identify which side remains accessible after scenery, speakers, and barriers are installed. A useful rehearsal follows one fault from identification to a restored image. The crew locates the cabinet, isolates power and data, replaces the approved part, confirms alignment, and returns the removed item to a marked case. This exposes missing tools or blocked access before show day. Image Consistency Must Survive Reassembly A rental wall is repeatedly rebuilt, so visual acceptance must be repeatable too. BP indoor and outdoor models list a 3,840 Hz refresh rate with configuration-specific gray levels. The finished image also depends on calibration, controller settings, content, and cameras. An LED wall for events should be checked with demanding content, not only a bright promotional loop. Dark gradients can expose low-level differences, thin text can reveal mapping errors, and side views can reveal a poor joint. A Repeatable Test Scene Makes Acceptance Faster The same test sequence should be used from warehouse preparation through handover. It can include gradients, neutral gray, skin tones, saturated colors, fine text, fast motion, and a controlled full-white check. Camera operators should test frame rate and shutter settings before doors open. The purpose is to separate normal venue differences from mapping, calibration, assembly, or signal faults. The Best Rental System Is the One the Crew Can Repeat One LED rental screen can serve different stages when its flexibility is defined. Repeatable geometry handles flat walls, wings, corners, and curves; separate indoor and outdoor configurations preserve suitability for each venue; and standard show files simplify changeovers. Compare the layouts used most often and confirm which cabinet mix covers them with the fewest exceptions. Share recurring stage drawings, viewing zones, rigging limits, and changeover timing through our project details page. BLC LED can then match the BP platform to the layouts your crew builds. FAQ Can One Rental Platform Be Used Indoors and Outdoors? One platform may offer indoor and outdoor models, but they are not identical. Brightness, protection, power behavior, and operating conditions must match the venue. Which Cabinet Size Works Best for Changing Stage Layouts? A 500 x 500 mm cabinet offers finer control around edges and curves, while a 1000 x 500 mm cabinet reduces handling across large flat areas. The best mix covers recurring drawings without creating rarely used combinations. Can Rental Panels Form a Curved Stage Wall? Yes, when the cabinet includes defined curve hardware. The BP series supports 45-degree inner and outer arcs in its specified configuration. Confirm the radius, connectors, support method, and model before approval. Is a 3,840 Hz Refresh Rate Enough for Live Event Video? A 3,840 Hz refresh rate is a strong foundation, but it does not guarantee every camera result. Gray-level performance, controller settings, camera frame rate, shutter settings, and exposure also matter. Test the full signal chain.
27th agosto 2026

Cómo calcular los costes de funcionamiento de las pantallas LED para exteriores

The purchase price is only the first bill attached to an outdoor display. Electricity, maintenance access, spare parts, and lost advertising time can quietly cost more over the screen’s working life. The useful buying question is therefore simple: which configuration will deliver the required visibility at the lowest realistic annual operating cost? The answer comes from modeling the site, not from choosing the lowest quotation. Put Every Recurring Cost on One Annual Line An outdoor LED screen needs a simple cost model before it needs a product comparison. Add annual electricity, planned maintenance, expected repair labor, access equipment, replacement parts, and the value of likely downtime. Keep installation and purchase costs separate so a cheap cabinet cannot hide an expensive service route. The calculation only needs to expose assumptions and make competing proposals comparable. Cost driver Evidence to collect Annual calculation Electricity Average draw at realistic brightness kW x operating hours x tariff Routine service Visit frequency and crew size Visits x labor and access cost Corrective repair Likely interventions and parts Events x labor, access, and parts Downtime Time to diagnose and restore Lost hours x value per active hour Separate Average Draw From Maximum Load Maximum power helps size electrical equipment, but average power is the better starting point for an energy budget. Content, brightness, and operating hours change actual consumption. Ask bidders to state both figures under defined conditions and compare one scenario. Our Outdoor Ti Series offers an average-power range of 100-200 W/m2 and a maximum range of 650-750 W/m2, depending on configuration and operating conditions. Those ranges are not an electricity bill by themselves. Apply the expected screen area, daily schedule, local tariff, and brightness profile to estimate one. Give Downtime a Financial Value Downtime becomes measurable when the operator values each unavailable hour. For a roadside billboard, that may be contracted media time; for a venue, a disrupted event. Even a rough value shows why fast diagnosis and accessible components can outweigh a small purchase discount. Match Brightness to the Site, Hour by Hour Brightness should follow ambient light rather than remain fixed at its daytime setting. Running an outdoor LED display harder than the site requires wastes electricity and can make nighttime content uncomfortable. The target is sufficient contrast, with lower output when conditions allow. Build a Usable Operating Profile A realistic profile separates full sun, overcast periods, dusk, night, and closed hours. Operators can then test changes without weakening the display’s purpose: Schedule the screen off when there is no audience or contracted content. Use lower brightness settings when ambient conditions allow. Avoid large white backgrounds when the campaign design can work with darker scenes. Review settings seasonally instead of leaving commissioning values untouched. Our Outdoor Ti Series provides model-dependent brightness options from 5,000 to 10,000 nits. The correct setting depends on orientation, shade, local rules, viewing distance, and content. A specification ceiling is capacity, not an all-day setting. Design One Common Repair Before Approving the Structure Maintenance cost is often decided by the steelwork and access route. An LED advertising screen that requires a lift, lane closure, or large crew for a module change will repeat that burden at every visit. The cheaper direction is the one technicians can use safely on site. Compare the Same Module-Swap Scenario Ask each bidder to describe one repair from fault alert to restored image. Count diagnosis, travel, access equipment, crew, removal, replacement, alignment, and testing. This turns “easy maintenance” into a sequence that can be priced. Our Outdoor Ti cabinets support both front and rear access, allowing the service direction to follow the installation. Front access can be useful where there is limited or no usable space behind the screen. Rear access can remain practical when a safe corridor already exists. Neither option is automatically cheaper; the surrounding structure and repeated labor decide the result. A waterproof LED display still needs serviceability. Our Outdoor Ti Series is rated IP65, but technicians must protect seals, connectors, and drainage paths whenever a cabinet is opened. Include those checks in the repair method. Buy Evidence That Protects the Cost Model A forecast is useful only if the delivered screen behaves like the proposal. Before shipment, verify consistent operation, module alignment, controls, and the agreed service procedure. Product verification should protect the cost model, not become a list of claims. At BLC LED, our quality-control process includes incoming inspection, in-process control, finished-product testing, and a 72-hour burn-in test. For a large outdoor LED video wall, the acceptance review should also reproduce the intended brightness schedule, check power readings, confirm front or rear removal, and record the controller configuration. A documented pre-shipment verification can help catch an expensive mismatch before freight and site labor make correction harder. The handover should include labeled spares, configuration backups, maintenance instructions, and fault-escalation contacts. These items shorten diagnosis and help the operator update the model with actual data. Use a Cost Rule That Remains Useful After Installation The best decision is the configuration with the lowest credible annual cost while meeting visibility, safety, and uptime needs. Compare average power under one operating profile, price one common repair, value downtime, and verify those assumptions before shipment. After launch, review electricity and service records quarterly; the model should become more accurate as the operator learns how the site behaves. For a project-specific comparison, share the screen area, location, operating schedule, access constraints, electricity tariff, and uptime target through our project contact page. We can map those inputs to an outdoor configuration without treating maximum specifications as everyday requirements. FAQ How Do I Estimate Annual Electricity Cost? Multiply expected average power in kilowatts by annual operating hours and the local electricity tariff. Use a day-and-night brightness profile instead of maximum power, which is mainly relevant to electrical-system sizing. Does Lower Brightness Always Mean Lower Operating Cost? Lower output generally reduces energy demand, but brightness must still protect visibility and the commercial purpose of the screen. The useful saving comes from matching output to ambient light and active audience hours. Is Front Service Always Cheaper Than Rear Service? No. Front service can avoid a rear corridor and shorten some repairs, while rear service may be efficient where safe access already exists. Price the same repair scenario for the actual structure before deciding. What Should a Pre-Shipment Test Cover? The test should cover image uniformity, controller settings, power behavior, brightness control, component removal, reassembly, and the agreed fault-recovery steps. Record the accepted configuration for site commissioning. How Often Should the Cost Model Be Updated? Review it quarterly during the first year, then at a frequency that matches operational change. Update actual energy use, service labor, parts, access costs, downtime, tariffs, and operating hours so future decisions use site evidence.
20th agosto 2026

¿Cómo se adapta una pantalla LED irregular a la arquitectura?

Introduction An irregular LED display fits architecture when its geometry, pixel layout, support structure, service access, and content are engineered as one system. Buyers should start with drawings and viewing conditions rather than selecting a standard cabinet first. This approach helps a custom screen follow curves, corners, columns, or sculptural forms while giving architects, contractors, advertisers, and integrators a clear basis for comparing proposals. Why Standard Rectangles Create Design Conflicts A conventional rectangular screen works well on a flat wall, but it can force awkward framing around curved or three-dimensional surfaces. An irregular LED display becomes part of the architectural form. It may wrap a column, turn a corner, form a ring, or create a freestanding object. Geometry Must Be Defined Before Cabinet Selection Accurate geometry is the first control point for a custom LED display. The supplier needs overall dimensions, radius, angle changes, mounting points, tolerances, and required openings. A curved LED screen designed from an approximate radius can produce gaps or stress modules and frames. Clear drawings show whether an angled cabinet, flexible module, or purpose-built enclosure is practical. Content Must Follow the Physical Surface Content planning is the second control point because unusual shapes change how images are viewed. A flexible LED display wrapped around a cylinder needs a different pixel map from a flat canvas. A creative LED display shaped as a sphere, cube, or disc needs safe zones for logos and text. Request a content template before production so the media team can test graphics across seams, corners, and curves. Match the Display Structure to the Shape The right structure depends on whether the form is curved, sharply angled, three-dimensional, fixed, or frequently moved. A custom LED display can be produced as arcs, circles, spheres, cubes, and other tailored forms, with dimensions adjusted to project requirements. BLC LED also supports modules that can follow highly curved surfaces. Flexible Modules Suit Continuous Curves A flexible LED display suits a smooth, continuous bend or non-flat substrate. The project still needs a stable support surface, accurate module alignment, organized power and signal routing, and a realistic maintenance method. Flexible modules do not replace structural engineering. Angled Cabinets Suit Repeatable Facets An angle-adjustable cabinet can suit repeatable facets, inner curves, or outer curves. BLC LED rental BP cabinets can form 45-degree inner and outer arcs with precision joints. This approach gives a curved LED screen predictable alignment, especially when it must be dismantled and rebuilt. The final choice should follow the radius and transport plan. Use these practical distinctions during concept review: Choose flexible modules for smooth curves and closely integrated surfaces. Choose angled cabinets for repeatable radii, faceted forms, or rental use. Choose purpose-built frames for spheres, cubes, discs, counters, and branded objects. Confirm the support structure before approving the visual design. Engineer Maintenance Before Fabrication Maintenance access is easiest to solve before frame manufacture. A creative LED display may look clean yet become difficult to operate if technicians cannot remove a module, power supply, or receiving card. Wall-flush, recessed, cylindrical, and sculptural installations often favor front access because rear space may not exist. Freestanding structures may allow rear access when a safe route is built into the frame. Specify a Component-Removal Path A maintenance plan should show how each serviceable part reaches the technician. For a curved LED screen, it must also protect neighboring modules during removal. Ask for the tools, access direction, cable clearances, spare-part position, and realignment steps. This evidence is more useful than a general promise of easy maintenance. Build a Complete RFQ Package A strong request for quotation reduces assumptions and makes supplier proposals easier to compare. Send the same project information to every bidder: Dimensioned architectural drawings, radius, angles, and mounting points. Intended indoor or outdoor location and expected viewing distances. Required shape, active display area, and preferred pixel pitch. Front-service or rear-service constraints and available working space. Content sources, playback formats, control method, and pixel-map needs. Packing, installation, commissioning, training, spares, and support expectations. This RFQ package separates a production-ready proposal from an attractive concept with unresolved engineering details. It also improves discussions about quality, risk, and operating effort. Verify Manufacturing and Quality Control Manufacturing control matters because dimensional errors can repeat across an entire custom LED display. BLC LED integrates research and development, production, sales, and service, supporting coordination from drawings through assembly. Its documented process includes incoming, in-process, and finished-product inspection, plus a 72-hour burn-in test before shipment. A pre-shipment review should confirm geometry, seam consistency, playback, controller configuration, and service procedure. For a shaped installation, assembly photos, video, or remote inspection can reveal mapping errors before international transport. Buyers should also request labeled packing and an installation sequence matching the approved drawings. Request an Engineering Review A workable design starts with accurate project inputs. Share your drawings, viewing distances, installation conditions, service constraints, and content requirements with BLC LED to discuss a creative LED display solution. The engineering review can then compare flexible modules, angled cabinets, and purpose-built structures before the shape and quotation are finalized. FAQ Can an Irregular LED Display Follow Any Shape? An irregular LED display can support arcs, circles, spheres, cubes, discs, counters, and other custom structures. Feasibility depends on radius, module size, structural support, viewing direction, service access, and content mapping. Is a Flexible LED Display the Same as a Curved Screen? A flexible LED display is one way to create a curve; another is an angle-adjustable cabinet or custom frame. The suitable method depends on continuous bends, repeatable facets, portability, and permanence. How Should Buyers Select Pixel Pitch for a Creative LED Display? A creative LED display should use a pixel pitch matched to viewing distance, content detail, surface geometry, and budget. Review simulated content at realistic scale because text and fine graphics behave differently across corners and curves. How Should a Curved LED Screen Be Maintained? A curved LED screen should have a documented front- or rear-service route, suitable removal tools, labeled cables, accessible spare parts, and an alignment procedure. The maintenance method should be tested during factory assembly rather than decided after installation.
13th agosto 2026
Hogar
WhatsApp
Correo electrónico
Contactos