Wie wandelt ein LED-Display Video in Licht um?

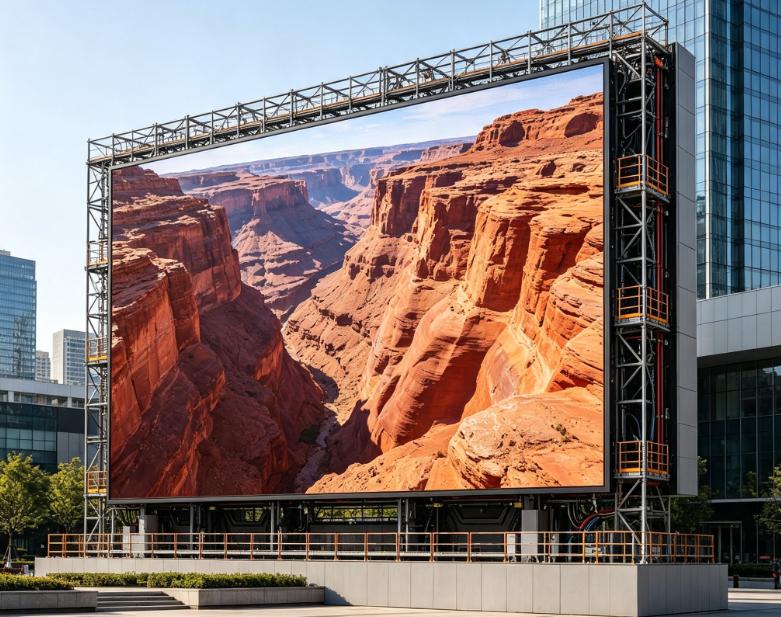
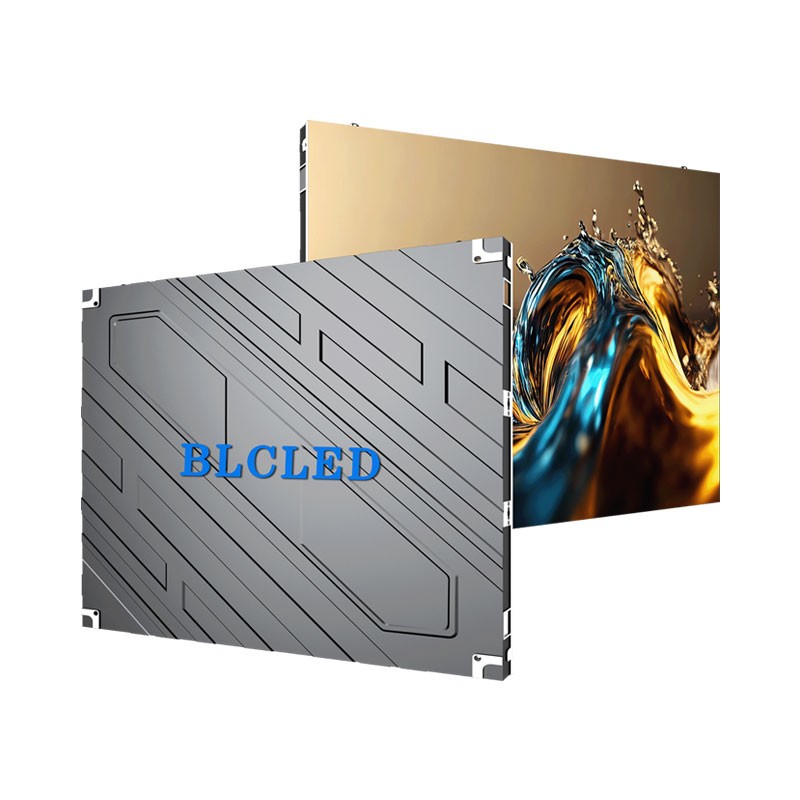
Ein Käufer sieht zwar ein helles Bild auf einer LED-Wand, kennt aber nicht die dahinterliegende Entscheidungskette. Kennt man diese Kette, lassen sich Inhalte, Betrachtungsabstand und Servicezugriffe leichter festlegen, ohne den Bildschirm als undurchsichtige Blackbox zu betrachten. Das Bild beginnt als zugeordnete Pixeldaten Ein LED-Display benötigt ein Videosignal, kann dieses aber erst anzeigen, nachdem ein Prozessor das Bild auf die physische Pixelanordnung abgebildet hat. Ein Laptop, Mediaplayer, eine Kamera oder ein Controller sendet Inhalte an den Prozessor. Der Videoprozessor und das Steuerungssystem skalieren und ordnen das eingehende Bild der Bildschirmfläche zu. Empfangskarten verteilen die zugeordneten Anzeigedaten anschließend an die entsprechenden Module. Deshalb sollte ein LED-Bildschirm mit seinem tatsächlichen Inhalt und der vorgesehenen Bildschirmgröße bestellt werden. Eine breite Willkommenswand, eine Bühnenkulisse und ein schmaler Informationsstreifen können zwar alle LEDs verwenden, ihre Ausrichtung und Inhaltsprioritäten unterscheiden sich jedoch von vornherein. Jedes Pixel mischt drei steuerbare Farben Jedes Vollfarbpixel nutzt rote, grüne und blaue Lichtquellen. Der Controller passt deren relative Leistung an, um die an der jeweiligen Stelle im Bild benötigte Farbe und Helligkeit zu erzeugen. Ein weißes Feld erfordert einen abgestimmten Beitrag aller drei Farbkanäle; eine tiefblaue Szene erfordert eine ganz andere Mischung. Millionen von kontrollierten Kombinationen ermöglichen Video, Text und Grafiken. Der Pixelabstand bezeichnet den Abstand zwischen den Mittelpunkten benachbarter Pixel und beeinflusst somit, wie nah Betrachter an ein Bild herangehen können, bevor sie die Bildstruktur erkennen. Ein kleinerer Pixelabstand ermöglicht feinere Details aus nächster Nähe, ist aber nur dann sinnvoll, wenn die Bildinformationen diese Details tatsächlich erfordern. Die entscheidende Frage ist, was die Menschen lesen müssen, und nicht einfach, welcher Wert am kleinsten ist. Das Gehäuse enthält Signalstrom und Ausrichtungsinformationen. Ein Anzeigemodul ist nur eine Schicht der fertigen Wand. Die Gehäuse bilden die mechanische Struktur und gewährleisten die Ausrichtung. Sie beherbergen die Netzteile, die Empfangshardware, die Module und die Signalverbindungen, die den Betrieb der einzelnen Module als ein einziges Display ermöglichen. Ist eine Gehäuselinie nicht korrekt ausgerichtet oder ein Signalweg falsch konfiguriert, kann selbst ein technisch einwandfreies Modul kein sauberes, durchgängiges Ergebnis liefern. Aus diesem Grund werden LED-Videowandpaneele als System geplant und nicht als einzelne Module ausgewählt. Das Installationsteam muss die Schrankaufteilung, die Controller-Kapazität, die Kabelführung, den elektrischen Schutz und eine praktikable Route für zukünftige Wartungsarbeiten bestätigen, bevor aussagekräftige Inhaltstests durchgeführt werden können. Bühne Was geschieht Warum das Projektteam das interessieren sollte Inhaltseingabe Eine Quelle sendet Video- oder Grafikinhalte an den Prozessor. Die Auflösung und das Seitenverhältnis der Quelle beeinflussen die Skalierung und die Lesbarkeit des Textes. Verarbeitung Der Prozessor ordnet jedes Einzelbild dem tatsächlichen Pixelbereich des Bildschirms zu. Eine korrekte Zuordnung verhindert beschnittene Bilder, verzerrte Logos und falsch platzierten Text. Empfang Empfangskarten verteilen die zugeordneten Daten an die Module in den einzelnen Schränken. Ein geplanter Signalweg hilft Technikern, einen Fehler zu lokalisieren, ohne den Rest der Wand zu beeinträchtigen. Lichtleistung Rote, grüne und blaue LEDs erzeugen die sichtbaren Pixelfarben. Helligkeit und Pixelabstand müssen zum Raum und zum nächstgelegenen sinnvollen Betrachter passen. Refresh sorgt für kohärente Bewegungsabläufe. Die Bildwiederholfrequenz beschreibt, wie häufig das LED-Ansteuersystem die Lichtausgabe aktualisiert, während die Bildrate angibt, wie häufig neue Videobilder angezeigt werden. Die Bildwiederholfrequenz ist besonders wichtig bei schnell bewegten Inhalten und wenn der LED-Bildschirm von einer Kamera aufgenommen wird. Sie ist neben der Bildrate, der Inhaltsaufbereitung, der Signalverarbeitung, der Kalibrierung, dem Umgebungslicht und dem physischen Zustand des Displays ein Faktor für die Bildqualität. Ein vollfarbiges LED-Display sollte daher mit dem Material getestet werden, das tatsächlich darauf abgespielt wird. Langsame Navigationsinhalte können Layoutprobleme und mangelhafte Kontrastwahl aufdecken; schnelle Produktvideos können Skalierungsfehler oder eine schwache Signalübertragung offenbaren. Es ist sinnvoller, beide Arten von Inhalten vor der Übergabe zu testen, als sich allein auf eine Endlosschleife zu verlassen. Ein einzelnes Modul muss im Schritt bleiben. Ein LED-Anzeigefeld muss die korrekten Timing- und Farbinformationen zusammen mit seinen Nachbarmodulen empfangen, da sonst Bildlücken, Timing-Inkonsistenzen oder sichtbare Farbabweichungen auftreten können. Physische Übergänge hingegen werden hauptsächlich durch die Ausrichtung und Ebenheit des Gehäuses kontrolliert. Die Inbetriebnahme sollte daher einen Test der gesamten Anzeigefläche umfassen und nicht nur die Überprüfung einzelner Module. Dies ist der einfachste Weg, um sicherzustellen, dass sich das gesamte Anzeigefeld wie eine einzige Oberfläche verhält. Die Betrachtungsumgebung vervollständigt das Bild Derselbe Bildschirm kann in einer schattigen Lobby klar erscheinen, neben hellem Glas jedoch angestrengt wirken, da das Umgebungslicht den wahrgenommenen Kontrast verändert. Betrachtungswinkel, Oberflächenreflexionen und der übliche Laufweg beeinflussen ebenfalls, was die Betrachter sehen. Diese Bedingungen sollten die Inhaltshierarchie ebenso stark bestimmen wie die Hardwareauswahl. Testen Sie den kleinsten wichtigen Text aus der nächstliegenden realistischen Betrachtungsposition. Überprüfen Sie ein Standbild.Bewegungsclip und Live-Quelle vor der Annahme des Mappings. Halten Sie die Verfügbarkeit von Strom, Signal und Diensten für das Betriebsteam dokumentiert. Wenn ein Projekt eine große, durchgehende Fläche benötigt, kann ein kommerzielles LED-Display diese Entscheidungen auf einer einzigen Oberfläche vereinen. Die Festinstallationsoptionen von BLC LED für den Innenbereich umfassen hochpräzise Gehäusekonstruktionen und Front-Service-Konfigurationen, die eine exakte Ausrichtung mit praktischer Wartungszugänglichkeit in bestehenden Gebäuden kombinieren. Eine praktische Methode, die Technologie zu verstehen Eine LED-Wand funktioniert, indem sie digital erfasste Informationen in gesteuertes Licht an Millionen von Pixelpositionen umwandelt. Der nächste sinnvolle Schritt besteht darin, dieses einfache Prinzip auf den Standort zu übertragen: den eigentlichen Inhalt definieren, den nächstgelegenen Betrachter ermitteln, die physische Oberfläche bestätigen und die Wartung der Wand planen. Diese Vorgehensweise sorgt dafür, dass die Technologie der Botschaft dient und das Projekt nicht zu einer reinen Spezifikationsübung verkommt. Häufig gestellte Fragen Enthält jedes LED-Pixel rotes, grünes und blaues Licht? Ein Vollfarbdisplay nutzt rote, grüne und blaue Lichtquellen, um die sichtbaren Pixelfarben zu erzeugen. Das genaue Gehäusedesign variiert je nach Produkt und Anwendung. Was ändert sich durch den Pixelabstand? Der Pixelabstand ist der Abstand zwischen den Pixeln. Er beeinflusst, wie viele Details aus einer bestimmten Betrachtungsentfernung wahrgenommen werden können und sollte der nächstgelegenen sinnvollen Betrachtungsposition des Betrachters entsprechen. Wozu wird ein Videoprozessor benötigt? Der Prozessor passt die eingehenden Inhalte an die physische Pixelstruktur des Bildschirms an, während das Steuerungssystem die zugeordneten Daten an die entsprechenden Anzeigebereiche verteilt. Kann dieselbe LED-Wand Live-Videos und Grafiken anzeigen? Ja, vorausgesetzt, Quelle, Prozessor, Mapping und Aktualisierungsleistung sind für das vorgesehene Material konfiguriert. Beides sollte während der Inbetriebnahme getestet werden. Was sollte das Baustellenteam vor der Übergabe überprüfen? Prüfen Sie den tatsächlichen Inhalt, die Zuordnung, die Helligkeit der installierten Leuchte, die Signalkontinuität und die sichere Route für routinemäßige Modul- oder Stromversorgungswartungen.
17. September 2026

Wie passen sich flexible LED-Bildschirme gekrümmten Räumen an?

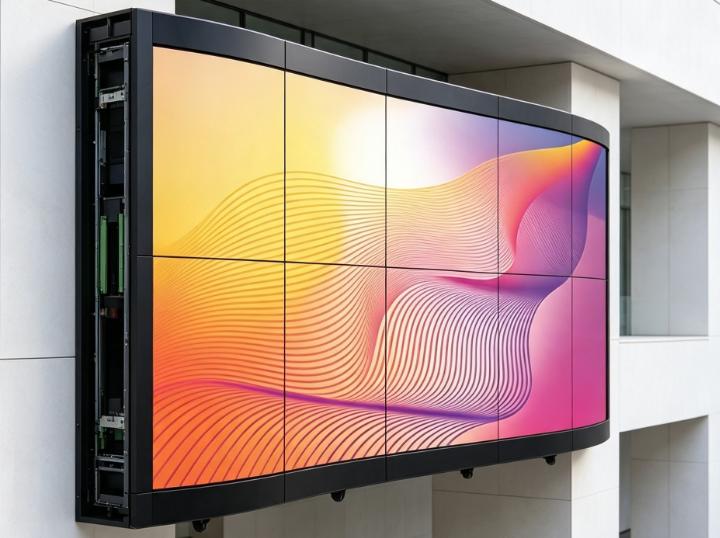
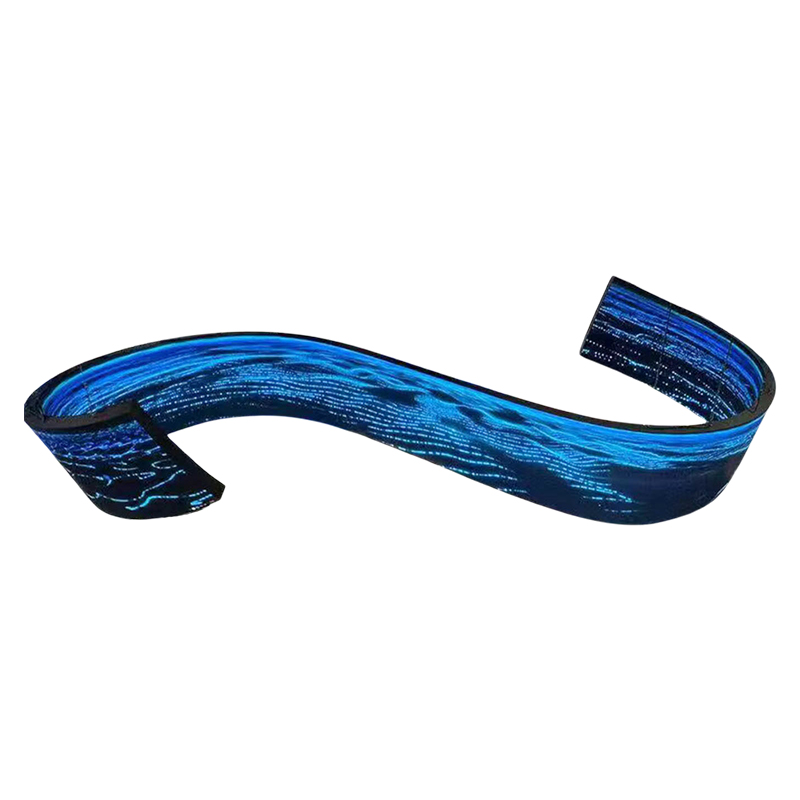
Eine flache LED-Wand lässt sich leicht entwerfen, doch viele Ladenflächen, Atrien, Museen und Markenfassaden sind nicht flach. Die entscheidende Frage ist nicht, ob sich ein flexibles Panel biegen lässt, sondern ob Biegungen, Wartungszugang, Bildqualität und Tragkonstruktion nach der Installation zuverlässig funktionieren. Dieser Artikel erklärt, wie Sie diese Anforderungen erfüllen, bevor ein gebogenes Konzept zu einem teuren Kompromiss wird. Die Form des Geländes bestimmt den Präsentationsansatz Die Geometrie des Standorts sollte ausschlaggebend sein, denn ein Bildschirm, der in der Ansicht gut aussieht, kann an Kanten, Fugen oder Installationspunkten Mängel aufweisen. Ein flexibler LED-Bildschirm ist sinnvoll, wenn die Montagefläche eine definierte Krümmung oder einen unregelmäßigen Umriss aufweist. Erfassen Sie die tatsächliche Oberfläche, die nutzbaren Abmessungen, die Betrachtungswinkel, Hindernisse und die Zugänglichkeit für den Techniker. Anhand dieser Messungen lässt sich feststellen, ob flexible Paneele, gebogene Gehäuse oder kleinere starre Abschnitte zuverlässig installiert werden können. Standortbedingungen Flexibler Ansatz Punkt zur Bestätigung Einzelner, sanfter Bogen Gebogene Module oder flexible Paneele Mindestradius und Stützabstand Dichter Zylinder oder Säule Flexible oder weich verbundene Module Nahtkontinuität und Kabelabstand Gemischte Kurven und Ecken Individuell geformte Abschnitte Übergangsgeometrie und Servicezugriff Flache Wand mit einer markanten Kurve Hybrid-Layout aus starren und flexiblen Elementen Gemeinsame Ausrichtung zwischen Systemen Der Radius ist eine mechanische Grenze, keine Konstruktionsvorschlag. Jedes flexible LED-Display hat einen festgelegten Biegebereich, der als mechanische Grenze zu beachten ist. Eine Überschreitung kann zu Spannungen, ungleichmäßigen Nähten oder Bauteilbeschädigungen führen. Prüfen Sie den Radius im Hinblick auf die gesamte Baugruppe, einschließlich Oberfläche, Befestigungselemente, Kabel und Schutzvorrichtungen. „Gebogen“ kann ganz unterschiedliche Ergebnisse beschreiben. Ein weiter Bogen kann gebogene Gehäuse erfordern, während eine schmale Säule eine flexible Verbindung und eine andere Trägermethode notwendig machen kann. Die gemessene Geometrie – und nicht allein die Tatsache, dass ein Design als „gebogen“ beschrieben wird – sollte darüber entscheiden, welche LED-Displaystruktur geeignet ist. Flexible Module lösen spezifische visuelle Probleme Flexible LED-Displays sind dann von Vorteil, wenn die Displayoberfläche sich verändernden architektonischen Konturen anpassen muss. Weiche Drahtverbindungen ermöglichen den Modulen eine größere Flexibilität bei der Anpassung an gekrümmte oder unregelmäßige Oberflächen als vollständig starre Baugruppen und tragen so zu einer gleichmäßigeren Ausrichtung der einzelnen Abschnitte bei. Der Nutzen ist am größten, wenn das Display in den Raum integriert ist, beispielsweise in Form einer geschwungenen Empfangswand, einer ummantelten Säule oder eines skulpturalen Elements. Die Konstruktion benötigt jedoch weiterhin eine stabile Unterkonstruktion und eine klare Rückstellmöglichkeit. Auch flexible Verbindungen erfordern eine sorgfältige Installation. Auch flexible Verbindungen erfordern eine geordnete Kabelführung, ausreichende Zugentlastung und eindeutige Kennzeichnung. Unsachgemäßes Kabelmanagement kann die Steckverbinder unnötig belasten, die Wartung erschweren und das Risiko instabiler Signal- oder Stromverbindungen erhöhen. Bitte prüfen Sie diese Kontrollen vor der Genehmigung: Markieren Sie die Biegerichtung und den minimalen Radius in der Zeichnung. Sorgen Sie für ausreichend Spielraum im Kabel, damit Bewegungen keine Spannung auf die Steckverbinder ausüben. Definieren Sie die Tragkonstruktion so, dass die LED-Module nicht als tragende Elemente verwendet werden. Für den Modulaustausch muss ein freier Zugangsweg hinter Verkleidungen oder angrenzenden Einrichtungsgegenständen gewährleistet sein. Testen Sie den engsten Radius und die am besten sichtbare Naht. Diese Steuerungsmöglichkeiten ermöglichen wiederholbare Flexibilität anstelle von Anpassungen vor Ort in letzter Minute. Die Bildqualität hängt von mehr als nur der Kurvendarstellung ab. Die endgültige Bildqualität hängt von Pixelabstand, Betrachtungsabstand, Kalibrierung, Bildverarbeitung, Bildinhalt und Geometrie ab. Betrachter aus nächster Nähe können Übergänge erkennen, die bei größerem Abstand verschwinden, während Kameras Bildwiederholfrequenz- oder scanbedingte Artefakte sichtbar machen können, die mit bloßem Auge nicht erkennbar sind. Ein gebogener Bildschirm benötigt weiterhin eine konsistente Kalibrierungsreferenz. Die Kalibrierung beginnt mit einer reproduzierbaren Referenz. Überprüfen Sie die Modulreihenfolge, die Pixelzuordnung, die Konfiguration der Empfangskarte und die Helligkeitskonsistenz, bevor Sie die gekrümmte Installation beurteilen. Ein gedrehter oder falsch zugeordneter Abschnitt kann bei wechselnden Winkeln schwieriger zu diagnostizieren sein. Verwenden Sie im Workshop und bei der Übergabe dieselben Testinhalte. Neutrale Graustufen-Testmuster decken Helligkeitsunterschiede auf, dunkle Farbverläufe zeigen geringfügige Ungleichmäßigkeiten auf, und feiner Text hilft, Zuordnungs- oder Ausrichtungsfehler zu erkennen. Testen Sie aus den wichtigsten Betrachtungspositionen, einschließlich der Seitenansicht. Wann eine individuelle Form besser ist als eine durchgehende Biegung Für Kreise, Kugeln, rechtwinklige Übergänge oder sich verändernde Konturen, denen eine einfache Biegung nicht folgen kann, eignet sich ein speziell geformtes LED-Display besser. Der Prozess beginnt mit präzisen Zeichnungen und einer klaren Trennung zwischen Displayfläche, Rahmen und Gebäudestruktur. BLC LED bietet flexible und kreativ gestaltete Anzeigesysteme für Anwendungen wie Bögen, Kreise, Säulen, Kugeln und würfelartige Strukturen. Ein Hybrid-Layout kann das Risiko reduzieren Eine Hybridlösung kann die Komplexität reduzieren, wenn nur ein Teil der Wand ein gebogenes Display benötigt. Starre Schränke können die flachen Bereiche abdecken, während flexible oder individuell geformte Module nur dort eingesetzt werden, wo die Geometrie dies erfordert.em. Prüfen Sie die Systemgrenzen. Bestätigen Sie Pixelabstand, Gehäusetiefe, Kalibrierung, Betrachtungswinkel und Wartungszugänglichkeit, um einen optisch und mechanisch konsistenten Übergang zu gewährleisten. Ein praktischer Genehmigungsweg für Projekte mit gebogenen LEDs Die Genehmigung sollte vier Fragen beantworten: Wie sieht die genaue Geometrie aus? Welche Konstruktion liegt innerhalb ihrer mechanischen Grenzen? Wie wird das Bild geprüft? Wie tauscht ein Techniker ein defektes Modul aus? Halten Sie ein übersichtliches Genehmigungspaket bereit, das die Maßzeichnung, die Radiuskarte, das Tragkonzept, die Kabeltrassen, die Abstände für Versorgungsleitungen und die Testergebnisse enthält. Das richtige flexible Display passt sich dem Standort und dem Arbeitsablauf an. Das richtige flexible Display sollte der vorgegebenen Geometrie folgen, ohne einen aufwendigen Wartungsaufwand zu verursachen. Flexible Module eignen sich gut für vorhersehbare Kurven, individuell geformte Abschnitte sind besser für veränderliche Konturen geeignet, und Hybrid-Layouts können den Aufwand für spezielle Konstruktionen reduzieren. Geometrie, Unterstützung, Servicezugänglichkeit und Bildtests sollten gemeinsam geprüft werden; anschließend kann mit einem klaren Anforderungsprofil die breitere Palette an LED-Display-Lösungen in Betracht gezogen werden. Häufig gestellte Fragen Wozu werden flexible LED-Bildschirme verwendet? Flexible LED-Bildschirme kommen überall dort zum Einsatz, wo sich die Anzeige an gekrümmte, zylindrische oder unregelmäßige Oberflächen anpassen muss. Sie eignen sich besonders für architektonische Elemente, Ladeneinrichtungen, Ausstellungen und Markenpräsentationsflächen, wo ein flaches Rechteck Lücken hinterlassen oder die gewünschte Form beeinträchtigen würde. Woran erkenne ich, ob die Kurve zu eng ist? Messen Sie den kleinsten Radius der gesamten Installation und vergleichen Sie ihn mit dem zulässigen Biegebereich des ausgewählten Panels oder Schranks. Berücksichtigen Sie dabei die Rückseite, die Anschlüsse, die Kabelführung und die Befestigungsmethode. Eine visuelle Nachbildung reicht niemals als Nachweis der mechanischen Kompatibilität aus. Sind flexible LED-Displays für den Außenbereich geeignet? Die Eignung hängt von der Schutzart, den verwendeten Materialien, der Helligkeit, dem Wärmemanagement und der Installationsmethode des jeweiligen Produkts ab. Ein flexibles LED-Display für den Innenbereich ist nicht automatisch für den Außenbereich geeignet. Bitte prüfen Sie die Umgebungsbedingungen und die Details zur Befestigung am vorgesehenen Einsatzort. Was sollte vor der Übergabe geprüft werden? Testen Sie die gesamte Signalkette mit Farbverläufen, feinem Text, dunklen Inhalten, Bewegung und neutralem Grau. Prüfen Sie die Übergänge von den Hauptsichtzonen, verifizieren Sie die Zuordnung und Kalibrierung und führen Sie einen Testmodultausch durch, solange der endgültige Zugangsweg noch verfügbar ist.
17. September 2026

Wie kann eine LED-Videowand im Innenbereich frei bleiben?

A lobby screen has only a few seconds to do its job. Visitors should be able to read a welcome message, find an event, or recognise a brand without stepping back, squinting, or waiting for an animation to finish. That practical test is a better starting point for an indoor display than a long feature list. Clarity begins with the visitor’s stopping distance Viewing distance is the first control on whether an image looks intentional or merely bright. In a reception area, people may pause close to the screen, walk past it at an angle, or look up while checking in. An indoor LED display screen must therefore make its smallest important text readable from the nearest realistic position, not just look impressive from across the room. Pixel pitch matters because it sets how much image detail can be formed within a given area. A smaller pitch can support finer detail at close range, but it does not rescue an overcrowded message or a poorly placed screen. Treat pitch as part of a reading-distance decision: map the closest standing point, the usual walking route, and the farthest point where the message still has to work. The nearest viewer sets the hard limit The nearest viewer often reveals problems that a wide room view hides. Small text can merge into a gray band, and diagonal graphics can look rough when the image is asked to carry more detail than the screen and distance can comfortably deliver. For that reason, a scale test should use the smallest real-world item that matters. Put the actual reception message, QR code, menu, or wayfinding arrow on a trial canvas. If it is not comfortably readable at the closest intended position, simplify the content or revisit the display plan before moving on to cabinet details. Message hierarchy keeps the wall useful Good lobby content gives the eye one clear task at a time. A screen can carry several messages through the day, yet each frame should make its main message obvious before a visitor has time to look away. This is where an indoor LED video wall earns its space: it can create a continuous canvas, but only if the content respects the way people actually pass through the room. Build each scene around a simple hierarchy: One primary message, such as a welcome, direction, or event name. One supporting detail, such as a time, floor, or short callout. Clear contrast between text and its background. Enough empty space that the message does not compete with decorative motion. Movement should support the message instead of delaying it. Slow, purposeful transitions can make a wall feel alive, while rapid looping effects make text harder to catch for people who enter mid-sequence. A clear first frame is especially valuable in a lobby, where most viewers will not wait for a second chance to read it. Light around the screen changes the result Ambient light affects whether contrast remains comfortable and legible. A wall facing glass, reflective stone, or a bright entry zone may need a different brightness setting from the same wall placed deeper inside the building. The useful target is readable contrast without turning the display into the brightest object in a space meant for conversation or arrival. The installation plan should also allow content calibration. Test a representative colour palette and a plain background during commissioning, then record the agreed settings for future updates. Lobby situation What visitors need to see A practical content response Close check-in point Names and directions Large type, short lines, stable first frame Long approach corridor One recognisable message Strong shape, limited copy, high contrast Waiting area Longer story or programme Slower sequence with clear scene changes A service route protects the visual standard Maintenance access affects clarity long after installation day. A screen that is difficult to reach can leave a failed module, a colour mismatch, or a damaged surface in view for longer than anyone planned. Front or rear access should follow the available building space and a safe component-removal path, not an assumption made after the wall is framed. This is also where a project team can connect visual goals to the actual product structure. BLC LED’s Indoor BT Series uses a rigid 640 x 480 format with high-precision construction, system-backup support, and a hard-wired HUB connection. For a fixed indoor LED screen wall, those features are relevant when the brief calls for orderly alignment and a dependable display path, rather than simply adding specifications to a proposal. The handover should identify the approved brightness profile, common content layouts, the safe service direction, and the steps for checking a replacement module against the surrounding image. Those details help a facilities team restore the intended look under pressure. The screen and the message need one final rehearsal A finished installation should be tested as visitors will use it, not only as technicians see it. Walk the entrance route, stand at the check-in point, and test the welcome line, directional information, and short branded sequence. This rehearsal also exposes whether an indoor LED display is carrying too much. If visitors need to stop and decode the wall, reduce the copy, enlarge the primary message, or break the information into scenes. An indoor advertising LED display screen works best when it gives people a useful cue quickly, then lets the architecture and service experience do the rest. Summary An indoor wall stays clear when the plan begins with the closest viewer, gives every frame a clear message hierarchy, and preserves the image through a realistic service route. For lobby projects, the next decision is not which specification sounds largest; it is whether the proposed screen and content work together at the exact places visitors will stand and move. FAQ Does a smaller pixel pitch always make lobby content better? A smaller pitch can improve close-range detail, but content hierarchy still matters. Large, well-spaced text and clear contrast are often more valuable than adding detail that the message does not need. What content should an indoor LED video wall show first? Show the message a visitor needs immediately, such as a welcome, direction, or event name. Place secondary details after the main message is already clear. Can an indoor LED screen wall handle both branding and wayfinding? Yes, provided the two purposes do not compete in the same moment. Use short wayfinding scenes when visitors need direction, then return to brand content when the screen has more time to tell a story.
3. September 2026

Wie kann eine LED-Mietleinwand an verschiedene Bühnen angepasst werden?

A rental screen earns its place when it moves between stage designs without forcing the crew to relearn the system. A keynote may need a wide wall, while the next show calls for wings, a corner, or a curve. The practical question is whether those shapes can be built predictably with one disciplined workflow. Flexible Inventory Depends on Repeatable Geometry An LED rental screen becomes versatile when cabinet sizes, locks, service access, and signal paths work as one platform. Unrelated cabinets multiply spare-part decisions and assembly habits. A useful system limits those changes while preserving layout flexibility. Panel Sizes Should Solve the Layout Math Stage drawings rarely share one set of proportions. A 500 x 500 mm cabinet gives finer edge control, while a 1000 x 500 mm cabinet reduces handling across a large rectangle. The useful mix reaches common dimensions without creating rarely used panels. This is where a defined rental family becomes relevant. BLC LED’s BP series includes 500 x 500 mm and 1000 x 500 mm indoor panel options. Its high-precision die-cast enclosure supports quick, accurate assembly, so the cabinet platform follows the layout plan. Curves Need a Known Angle and Radius A curve is dependable only when the drawing and cabinet mechanism describe the same geometry. The BP platform supports 45-degree inner and outer curves, and eight cabinets can form a 1.25-meter-diameter circle in the specified configuration. That makes a curved LED screen a planned shape rather than an improvised bend. The radius must still be confirmed for the exact model, connectors, and supporting structure. Cabinets with the same outside dimensions do not necessarily share curve hardware or load paths. Indoor and Outdoor Shows Need Separate Configurations LED screens for events may share a modular appearance, but a ballroom and an open-air festival create different conditions. The inventory plan can preserve one workflow while keeping environmental specifications separate. Indoor and outdoor cabinets should not be treated as interchangeable. Brightness Follows the Venue, Not the Largest Number Indoor BP models provide 600 or 800 nits depending on pitch, while outdoor BP models provide 3,500 to 5,000 nits. Indoor output must work with controlled lighting and cameras; an outdoor stage may need more headroom against daylight. Protection ratings also separate the groups: indoor BP models are IP31, while outdoor BP models are IP65. Naming and packing logic can remain familiar without assigning one configuration to every venue. Viewing Distance Sets the Useful Pixel Pitch Pixel pitch should follow the nearest important viewing position and the level of detail in the content. The BP indoor range covers P1.56 through P3.91, while the outdoor range covers P1.95 through P4.81. A smaller pitch supports closer viewing, but screen size, processing, and budget still matter. A stage rental LED screen therefore needs a layout record with physical dimensions and the expected audience zone. A drawing without its viewing assumptions may fail at the next venue. Fast Changeovers Come From Standard Work Changeover speed depends on decisions made before loading. Cabinet labels, cable maps, controller files, spare locations, and packing order should match the drawing. Stable details let the crew focus on what is genuinely different. A practical show file should contain: A cabinet map with row, column, and curve positions. Power and data routes that match labeled cables. A controller preset named for the event and screen. A spare plan for compatible modules, cabinets, and tools. A quarantine rule for damaged parts. One Repair Should Be Rehearsed Before Show Day Service access matters because a fast build is incomplete if a failed section cannot be reached. BP rental cabinets support front and rear maintenance. The plan should identify which side remains accessible after scenery, speakers, and barriers are installed. A useful rehearsal follows one fault from identification to a restored image. The crew locates the cabinet, isolates power and data, replaces the approved part, confirms alignment, and returns the removed item to a marked case. This exposes missing tools or blocked access before show day. Image Consistency Must Survive Reassembly A rental wall is repeatedly rebuilt, so visual acceptance must be repeatable too. BP indoor and outdoor models list a 3,840 Hz refresh rate with configuration-specific gray levels. The finished image also depends on calibration, controller settings, content, and cameras. An LED wall for events should be checked with demanding content, not only a bright promotional loop. Dark gradients can expose low-level differences, thin text can reveal mapping errors, and side views can reveal a poor joint. A Repeatable Test Scene Makes Acceptance Faster The same test sequence should be used from warehouse preparation through handover. It can include gradients, neutral gray, skin tones, saturated colors, fine text, fast motion, and a controlled full-white check. Camera operators should test frame rate and shutter settings before doors open. The purpose is to separate normal venue differences from mapping, calibration, assembly, or signal faults. The Best Rental System Is the One the Crew Can Repeat One LED rental screen can serve different stages when its flexibility is defined. Repeatable geometry handles flat walls, wings, corners, and curves; separate indoor and outdoor configurations preserve suitability for each venue; and standard show files simplify changeovers. Compare the layouts used most often and confirm which cabinet mix covers them with the fewest exceptions. Share recurring stage drawings, viewing zones, rigging limits, and changeover timing through our project details page. BLC LED can then match the BP platform to the layouts your crew builds. FAQ Can One Rental Platform Be Used Indoors and Outdoors? One platform may offer indoor and outdoor models, but they are not identical. Brightness, protection, power behavior, and operating conditions must match the venue. Which Cabinet Size Works Best for Changing Stage Layouts? A 500 x 500 mm cabinet offers finer control around edges and curves, while a 1000 x 500 mm cabinet reduces handling across large flat areas. The best mix covers recurring drawings without creating rarely used combinations. Can Rental Panels Form a Curved Stage Wall? Yes, when the cabinet includes defined curve hardware. The BP series supports 45-degree inner and outer arcs in its specified configuration. Confirm the radius, connectors, support method, and model before approval. Is a 3,840 Hz Refresh Rate Enough for Live Event Video? A 3,840 Hz refresh rate is a strong foundation, but it does not guarantee every camera result. Gray-level performance, controller settings, camera frame rate, shutter settings, and exposure also matter. Test the full signal chain.
27. August 2026

Wie berechnet man die Betriebskosten von LED-Außenbildschirmen?

The purchase price is only the first bill attached to an outdoor display. Electricity, maintenance access, spare parts, and lost advertising time can quietly cost more over the screen’s working life. The useful buying question is therefore simple: which configuration will deliver the required visibility at the lowest realistic annual operating cost? The answer comes from modeling the site, not from choosing the lowest quotation. Put Every Recurring Cost on One Annual Line An outdoor LED screen needs a simple cost model before it needs a product comparison. Add annual electricity, planned maintenance, expected repair labor, access equipment, replacement parts, and the value of likely downtime. Keep installation and purchase costs separate so a cheap cabinet cannot hide an expensive service route. The calculation only needs to expose assumptions and make competing proposals comparable. Cost driver Evidence to collect Annual calculation Electricity Average draw at realistic brightness kW x operating hours x tariff Routine service Visit frequency and crew size Visits x labor and access cost Corrective repair Likely interventions and parts Events x labor, access, and parts Downtime Time to diagnose and restore Lost hours x value per active hour Separate Average Draw From Maximum Load Maximum power helps size electrical equipment, but average power is the better starting point for an energy budget. Content, brightness, and operating hours change actual consumption. Ask bidders to state both figures under defined conditions and compare one scenario. Our Outdoor Ti Series offers an average-power range of 100-200 W/m2 and a maximum range of 650-750 W/m2, depending on configuration and operating conditions. Those ranges are not an electricity bill by themselves. Apply the expected screen area, daily schedule, local tariff, and brightness profile to estimate one. Give Downtime a Financial Value Downtime becomes measurable when the operator values each unavailable hour. For a roadside billboard, that may be contracted media time; for a venue, a disrupted event. Even a rough value shows why fast diagnosis and accessible components can outweigh a small purchase discount. Match Brightness to the Site, Hour by Hour Brightness should follow ambient light rather than remain fixed at its daytime setting. Running an outdoor LED display harder than the site requires wastes electricity and can make nighttime content uncomfortable. The target is sufficient contrast, with lower output when conditions allow. Build a Usable Operating Profile A realistic profile separates full sun, overcast periods, dusk, night, and closed hours. Operators can then test changes without weakening the display’s purpose: Schedule the screen off when there is no audience or contracted content. Use lower brightness settings when ambient conditions allow. Avoid large white backgrounds when the campaign design can work with darker scenes. Review settings seasonally instead of leaving commissioning values untouched. Our Outdoor Ti Series provides model-dependent brightness options from 5,000 to 10,000 nits. The correct setting depends on orientation, shade, local rules, viewing distance, and content. A specification ceiling is capacity, not an all-day setting. Design One Common Repair Before Approving the Structure Maintenance cost is often decided by the steelwork and access route. An LED advertising screen that requires a lift, lane closure, or large crew for a module change will repeat that burden at every visit. The cheaper direction is the one technicians can use safely on site. Compare the Same Module-Swap Scenario Ask each bidder to describe one repair from fault alert to restored image. Count diagnosis, travel, access equipment, crew, removal, replacement, alignment, and testing. This turns “easy maintenance” into a sequence that can be priced. Our Outdoor Ti cabinets support both front and rear access, allowing the service direction to follow the installation. Front access can be useful where there is limited or no usable space behind the screen. Rear access can remain practical when a safe corridor already exists. Neither option is automatically cheaper; the surrounding structure and repeated labor decide the result. A waterproof LED display still needs serviceability. Our Outdoor Ti Series is rated IP65, but technicians must protect seals, connectors, and drainage paths whenever a cabinet is opened. Include those checks in the repair method. Buy Evidence That Protects the Cost Model A forecast is useful only if the delivered screen behaves like the proposal. Before shipment, verify consistent operation, module alignment, controls, and the agreed service procedure. Product verification should protect the cost model, not become a list of claims. At BLC LED, our quality-control process includes incoming inspection, in-process control, finished-product testing, and a 72-hour burn-in test. For a large outdoor LED video wall, the acceptance review should also reproduce the intended brightness schedule, check power readings, confirm front or rear removal, and record the controller configuration. A documented pre-shipment verification can help catch an expensive mismatch before freight and site labor make correction harder. The handover should include labeled spares, configuration backups, maintenance instructions, and fault-escalation contacts. These items shorten diagnosis and help the operator update the model with actual data. Use a Cost Rule That Remains Useful After Installation The best decision is the configuration with the lowest credible annual cost while meeting visibility, safety, and uptime needs. Compare average power under one operating profile, price one common repair, value downtime, and verify those assumptions before shipment. After launch, review electricity and service records quarterly; the model should become more accurate as the operator learns how the site behaves. For a project-specific comparison, share the screen area, location, operating schedule, access constraints, electricity tariff, and uptime target through our project contact page. We can map those inputs to an outdoor configuration without treating maximum specifications as everyday requirements. FAQ How Do I Estimate Annual Electricity Cost? Multiply expected average power in kilowatts by annual operating hours and the local electricity tariff. Use a day-and-night brightness profile instead of maximum power, which is mainly relevant to electrical-system sizing. Does Lower Brightness Always Mean Lower Operating Cost? Lower output generally reduces energy demand, but brightness must still protect visibility and the commercial purpose of the screen. The useful saving comes from matching output to ambient light and active audience hours. Is Front Service Always Cheaper Than Rear Service? No. Front service can avoid a rear corridor and shorten some repairs, while rear service may be efficient where safe access already exists. Price the same repair scenario for the actual structure before deciding. What Should a Pre-Shipment Test Cover? The test should cover image uniformity, controller settings, power behavior, brightness control, component removal, reassembly, and the agreed fault-recovery steps. Record the accepted configuration for site commissioning. How Often Should the Cost Model Be Updated? Review it quarterly during the first year, then at a frequency that matches operational change. Update actual energy use, service labor, parts, access costs, downtime, tariffs, and operating hours so future decisions use site evidence.
20. August 2026

Wie fügt sich ein unregelmäßiges LED-Display in die Architektur ein?

Introduction An irregular LED display fits architecture when its geometry, pixel layout, support structure, service access, and content are engineered as one system. Buyers should start with drawings and viewing conditions rather than selecting a standard cabinet first. This approach helps a custom screen follow curves, corners, columns, or sculptural forms while giving architects, contractors, advertisers, and integrators a clear basis for comparing proposals. Why Standard Rectangles Create Design Conflicts A conventional rectangular screen works well on a flat wall, but it can force awkward framing around curved or three-dimensional surfaces. An irregular LED display becomes part of the architectural form. It may wrap a column, turn a corner, form a ring, or create a freestanding object. Geometry Must Be Defined Before Cabinet Selection Accurate geometry is the first control point for a custom LED display. The supplier needs overall dimensions, radius, angle changes, mounting points, tolerances, and required openings. A curved LED screen designed from an approximate radius can produce gaps or stress modules and frames. Clear drawings show whether an angled cabinet, flexible module, or purpose-built enclosure is practical. Content Must Follow the Physical Surface Content planning is the second control point because unusual shapes change how images are viewed. A flexible LED display wrapped around a cylinder needs a different pixel map from a flat canvas. A creative LED display shaped as a sphere, cube, or disc needs safe zones for logos and text. Request a content template before production so the media team can test graphics across seams, corners, and curves. Match the Display Structure to the Shape The right structure depends on whether the form is curved, sharply angled, three-dimensional, fixed, or frequently moved. A custom LED display can be produced as arcs, circles, spheres, cubes, and other tailored forms, with dimensions adjusted to project requirements. BLC LED also supports modules that can follow highly curved surfaces. Flexible Modules Suit Continuous Curves A flexible LED display suits a smooth, continuous bend or non-flat substrate. The project still needs a stable support surface, accurate module alignment, organized power and signal routing, and a realistic maintenance method. Flexible modules do not replace structural engineering. Angled Cabinets Suit Repeatable Facets An angle-adjustable cabinet can suit repeatable facets, inner curves, or outer curves. BLC LED rental BP cabinets can form 45-degree inner and outer arcs with precision joints. This approach gives a curved LED screen predictable alignment, especially when it must be dismantled and rebuilt. The final choice should follow the radius and transport plan. Use these practical distinctions during concept review: Choose flexible modules for smooth curves and closely integrated surfaces. Choose angled cabinets for repeatable radii, faceted forms, or rental use. Choose purpose-built frames for spheres, cubes, discs, counters, and branded objects. Confirm the support structure before approving the visual design. Engineer Maintenance Before Fabrication Maintenance access is easiest to solve before frame manufacture. A creative LED display may look clean yet become difficult to operate if technicians cannot remove a module, power supply, or receiving card. Wall-flush, recessed, cylindrical, and sculptural installations often favor front access because rear space may not exist. Freestanding structures may allow rear access when a safe route is built into the frame. Specify a Component-Removal Path A maintenance plan should show how each serviceable part reaches the technician. For a curved LED screen, it must also protect neighboring modules during removal. Ask for the tools, access direction, cable clearances, spare-part position, and realignment steps. This evidence is more useful than a general promise of easy maintenance. Build a Complete RFQ Package A strong request for quotation reduces assumptions and makes supplier proposals easier to compare. Send the same project information to every bidder: Dimensioned architectural drawings, radius, angles, and mounting points. Intended indoor or outdoor location and expected viewing distances. Required shape, active display area, and preferred pixel pitch. Front-service or rear-service constraints and available working space. Content sources, playback formats, control method, and pixel-map needs. Packing, installation, commissioning, training, spares, and support expectations. This RFQ package separates a production-ready proposal from an attractive concept with unresolved engineering details. It also improves discussions about quality, risk, and operating effort. Verify Manufacturing and Quality Control Manufacturing control matters because dimensional errors can repeat across an entire custom LED display. BLC LED integrates research and development, production, sales, and service, supporting coordination from drawings through assembly. Its documented process includes incoming, in-process, and finished-product inspection, plus a 72-hour burn-in test before shipment. A pre-shipment review should confirm geometry, seam consistency, playback, controller configuration, and service procedure. For a shaped installation, assembly photos, video, or remote inspection can reveal mapping errors before international transport. Buyers should also request labeled packing and an installation sequence matching the approved drawings. Request an Engineering Review A workable design starts with accurate project inputs. Share your drawings, viewing distances, installation conditions, service constraints, and content requirements with BLC LED to discuss a creative LED display solution. The engineering review can then compare flexible modules, angled cabinets, and purpose-built structures before the shape and quotation are finalized. FAQ Can an Irregular LED Display Follow Any Shape? An irregular LED display can support arcs, circles, spheres, cubes, discs, counters, and other custom structures. Feasibility depends on radius, module size, structural support, viewing direction, service access, and content mapping. Is a Flexible LED Display the Same as a Curved Screen? A flexible LED display is one way to create a curve; another is an angle-adjustable cabinet or custom frame. The suitable method depends on continuous bends, repeatable facets, portability, and permanence. How Should Buyers Select Pixel Pitch for a Creative LED Display? A creative LED display should use a pixel pitch matched to viewing distance, content detail, surface geometry, and budget. Review simulated content at realistic scale because text and fine graphics behave differently across corners and curves. How Should a Curved LED Screen Be Maintained? A curved LED screen should have a documented front- or rear-service route, suitable removal tools, labeled cables, accessible spare parts, and an alignment procedure. The maintenance method should be tested during factory assembly rather than decided after installation.
13. August 2026
Heim
WhatsApp
E-Mail
Kontakte